Let me first give credit where it is due. I've found this most amazing quilt site with the most amazing tutorials. The lady does the most amazing work.... I know, I keep using the work amazing! Try this blog: http://www.thequiltingedge.com/ That said the following quilt idea came from her tutorial and making two quilts at the same time.
First you start with 15" squares of batting. Since this was only going to be a learning quilt, I only cut out four squares. Tomorrow if Joannes still has the same packet of material I will get it and expand on the size of the quilt. So here it goes with pictures.
The first piece goes face up, the second piece goes face down. You have two right side materials facing each other. Sew with a quarter inch seam, press open and continue until you whole square is filled. You are making a log cabin pattern.
DO NOT SQUARE UP YOUR BLOCK AT THIS TIME!
I won't bore you will the step by step for each quilt.
These are my four finished blocks. I used other material from my stash and scraps. Again, do not square up your blocks! Set these four squares aside.
The back of the quilt can be as much fun, if not more. I went for a totally different color run. The back squares are sewn independently and when finished are placed on the back. This is when you do all of your top stitching. I put on my walking foot and did straight stitching to hold all three pieces together. You can get as fancy as you like for this stitching.
The backs. Again, DO NOT square up your blocks until you are ready to join them. The next step of joining the block is on hold for the moment but if you want to know how to do it see the blog link that I have attached.
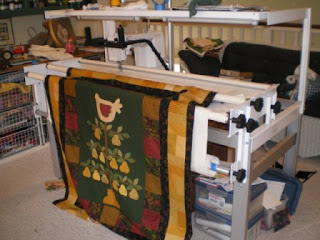
Being I jump from project to project the following quilt top was made last year. I am only now getting back to it since I have the time to finish it. I still hesitate with the "big" machine sewing as I don't have the skill to do the pretty fancy top stitching and this sewing machine is so hard to get the tension just right. I can spend as much time sewing with it as ripping out what has been sewn.
All set and ready to go! Maybe today!!!
Happy Trying Something New Day!


No comments:
Post a Comment